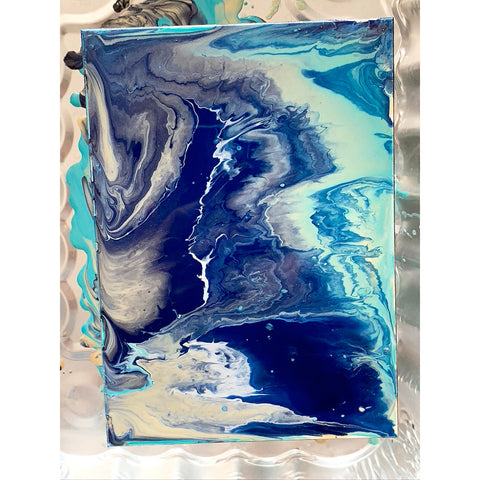
My Paint Pouring Experiments
Share
I kicked off the new year with a paint pouring project!
I discovered paint pouring over a year ago when I attended a workshop at Blick Art on 23rd street in NYC and since then, this has been on my radar to try.
I decided that paint poured artwork would make the perfect piece to hang above my sofa. My goal was to create new living room art in 2020, but somehow I let the whole year pass by and I did not make the time to try this new art form.
That all changed this past weekend, when I decided to dedicate Sunday afternoon to experiment with a variety of paint pouring techniques.
My source for learning and inspiration is this book: The Art of Paint Pouring by Amanda VanEver.

This book walks you through the basic paint supplies needed, how to mix paint, what mediums to use, different techniques to pour paint and finally how to finish your work with a glaze or resin.
Let's start with the supplies...

Paints
There are a variety of paints that you can use for paint pouring, but my preferred choice is Golden Fluid Acrylic. The colors I chose to experiment with are: iridescent gold, iridescent copper, zinc white, prussian blue, manganese blue, teal, quinacridone magenta and primary yellow.

In individual cups, I mixed 1 part of paint with 2 parts Golden Color Pouring Medium Gloss. I just eyeballed an approximate measure of paint to pouring medium..so don’t feel you have to do an exact measure with a measuring spoon or cup! The book does suggest to add water in addition to the pouring medium, however I did not do this, as I felt the paint mix I made was thin enough and had a good flow consistency.

Gesso Boards
These 5x7 flat gesso boards come as a pack of 3 and are perfect if you want to experiment first before painting a larger canvas.
When I’m ready to paint pour again for the purpose of making my living room artwork, I will use larger gesso boards with a wood panel. These will not require additional framing and will be easier to hang.
Let the Painting Pouring Begin...
I was inspired by two techniques outlined in the book: dirty pour and puddle pour. I ended up mixing both of these techniques which produced very interesting results.
The Dirty Pour is the easiest technique which requires you to first mix the paint colors individually and then pour all the colors into one container. After a quick stir, you then pour the mixture and start to tilt the canvas around letting the paints move and blend.
For the Puddle Pour you pour and puddle the paint on the canvas in certain spots, layering the paints on top of each other and then tilt the canvas to blend and move the paints.

Paint pouring is so much fun..but it is messy! Make sure you set up your space with plastic covers, paper towels and wet wipes. And definitely wear gloves!
Here are the practice boards that I created:
 |
 |

|
 |
 |
 |
I created a little video of my technique and posted it to my Instagram IGTV channel.
Now that I have the hang of it, I’m ready to start on a larger canvas!
I hope I’ve inspired you to try a paint pouring project of your own!

